Top rated

Saturn FB385 inflatable boats on boat trailer
Mounting a Saturn FB385 on a Trailer: Practical Guide and Options
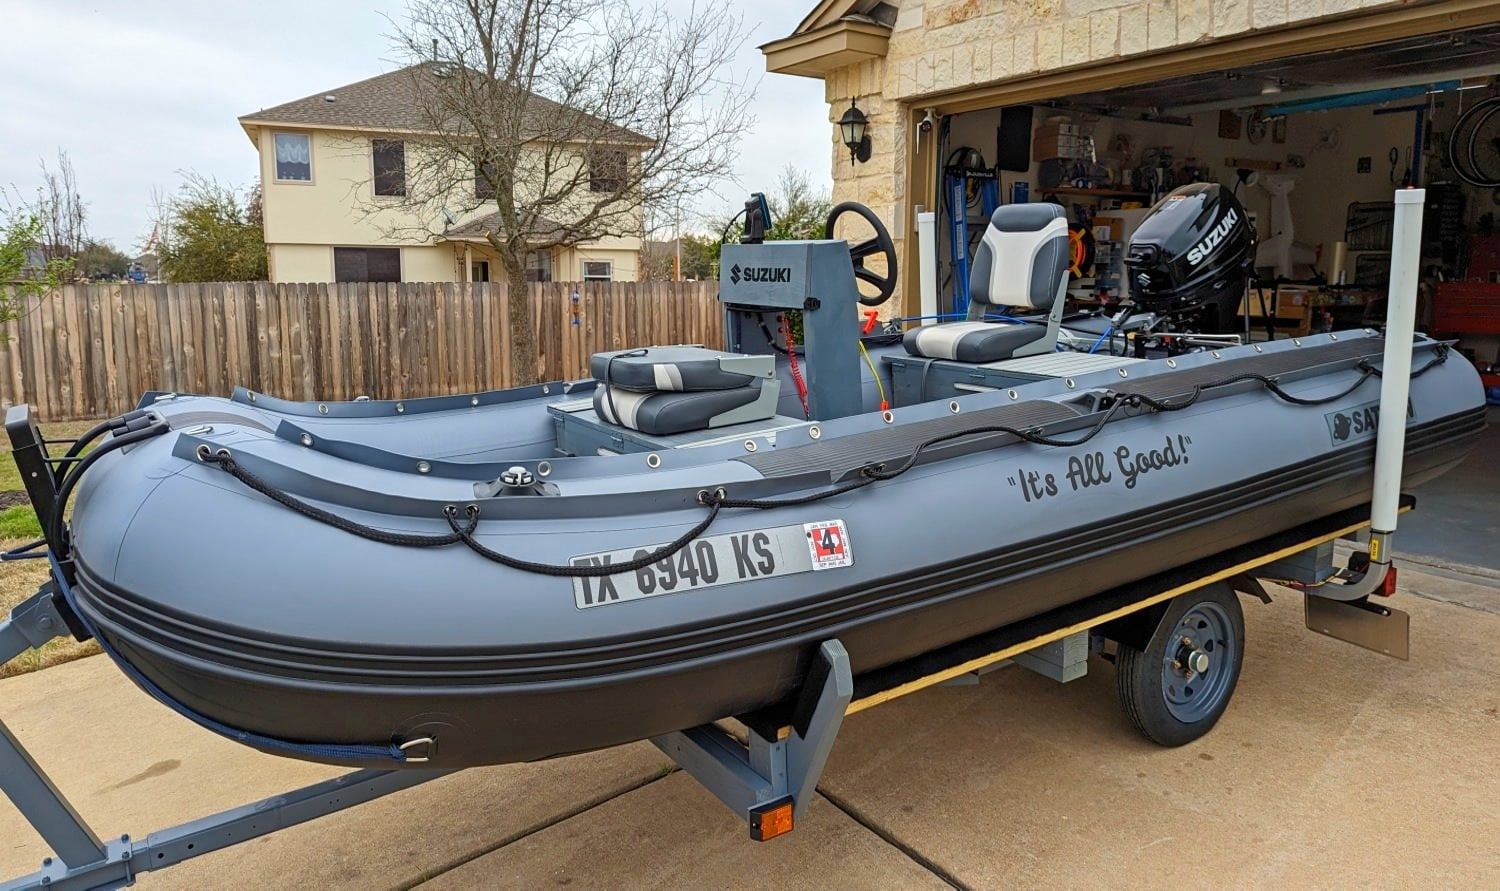
The Saturn FB385 is a 13-foot heavy-duty inflatable fishing boat, around 145 lb before motor and gear, with a wide 67-inch beam and big 18-inch tubes.(boatstogo.com) Once you add an outboard, fuel, and equipment, moving it around by hand gets old fast. Mounting it on a trailer and keeping it inflated is often the easiest, fastest way to get on the water.
Below is a practical guide to setting up a Saturn FB385 on three common trailer types:
- Jet ski (PWC) trailer
- Flatbed utility trailer (such as a folding 4x8 from Harbor Freight or similar)
- Small boat trailer for 12–14 ft aluminum boats
The basic goals are always the same:
- Support the inflatable hull evenly
- Protect the PVC from sharp edges
- Keep weight balanced for safe towing
General trailer and loading basics
Before choosing a trailer type, keep these points in mind:
- Boat length: FB385 is 13 ft overall, with about 9.6 ft inside length.(saturninflatableboats.ca) Any trailer that comfortably fits a 12–14 ft boat can usually be adjusted for it.
- Weight: The bare boat is about 145 lb. Add motor, fuel, and gear and you can easily reach 250–350 lb on the trailer.(boatstogo.com)
- Tongue weight: Aim for roughly 10–15% of total loaded trailer weight on the hitch for stable towing.(Weigh Safe)
- Support type: Bunks or a padded flat deck are best. Avoid relying on hard rollers pressing directly into PVC.
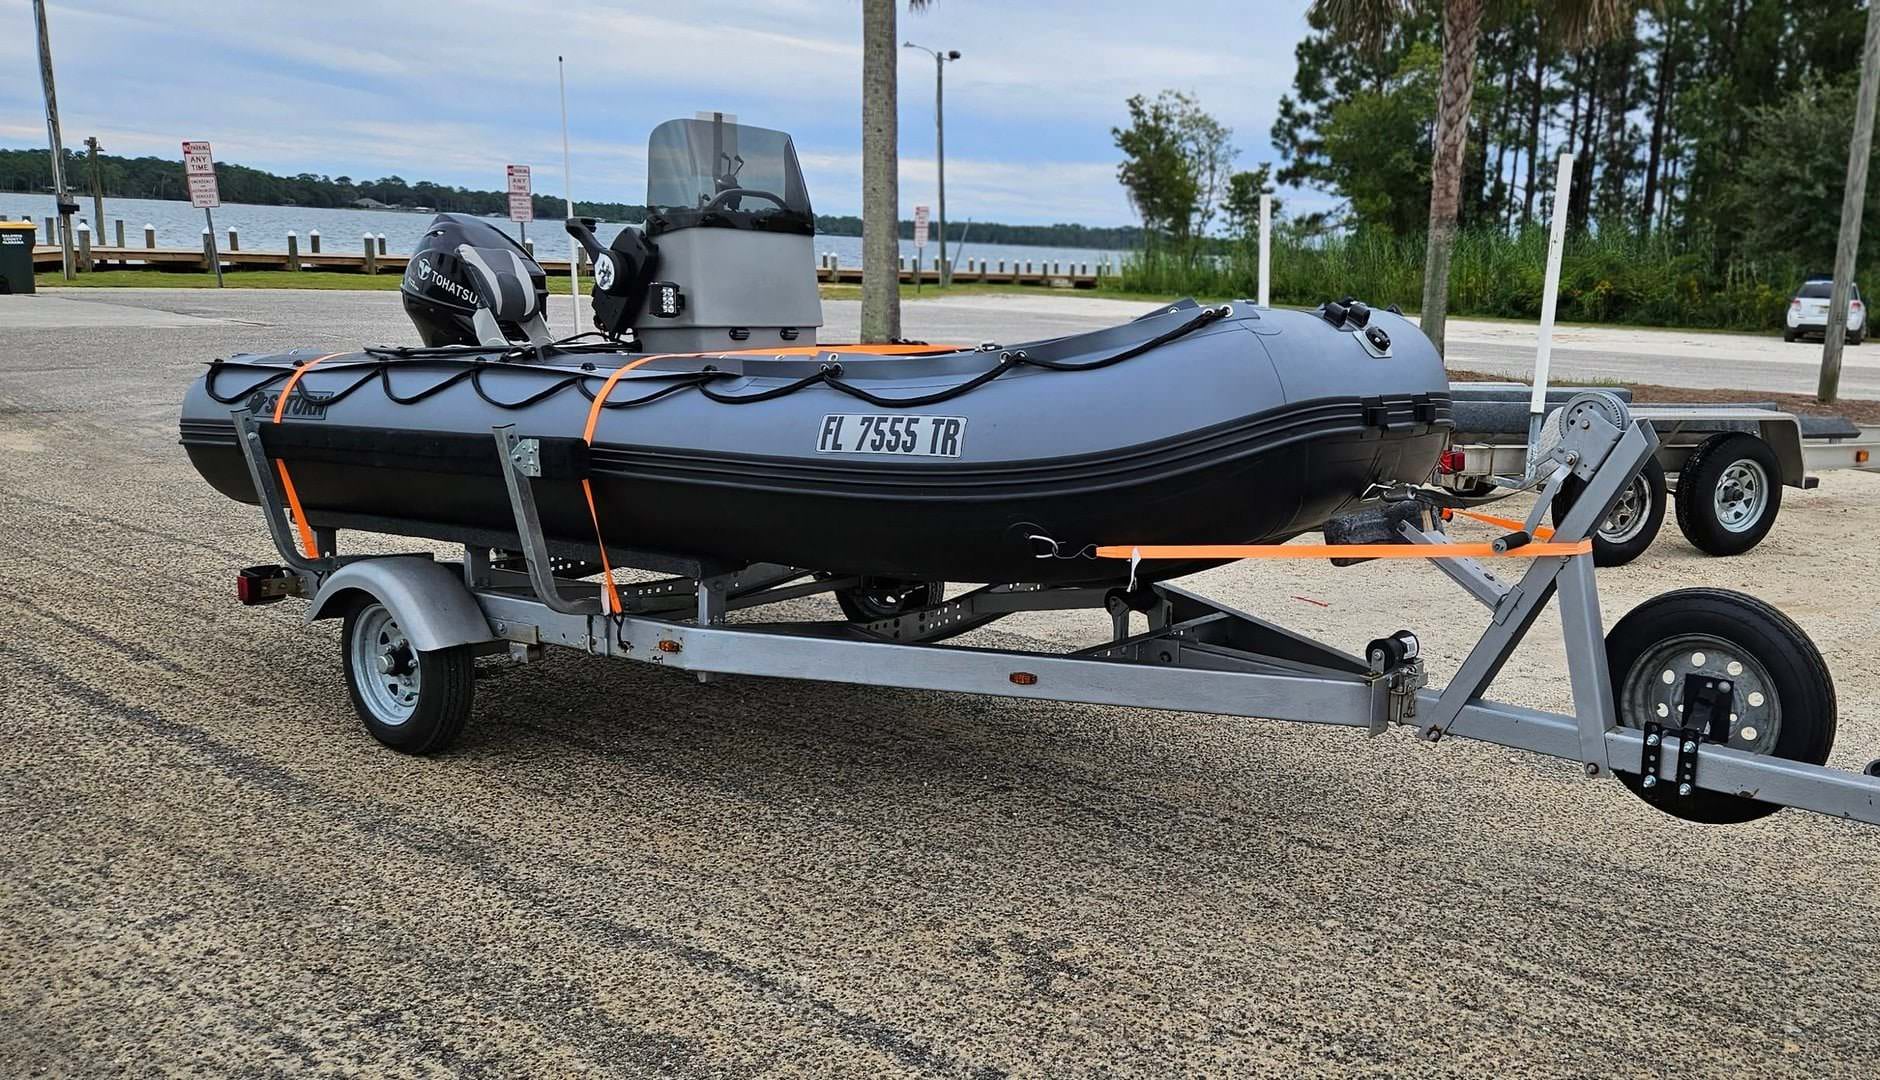
Option 1: Using a jet ski (PWC) trailer
A jet ski trailer is often the easiest match for the FB385 because it is already sized for a compact hull and usually has carpeted bunks and a winch post.
Steps and tips:
- Adjust the bunks
- Set the bunks wide enough that each bunk supports a good portion of the inflatable tubes, not just the V-keel.
- Ideally, the keel sits in the gap between the bunks while the tubes rest along the bunk tops.
- If the bunks are too narrow, you can:
- Move them outward on their brackets, or
- Bolt on wider boards (2x6 or 2x8) and re-carpet them for a larger support surface.
- Set trailer length and bow stop
- With the FB385 inflated, position it on the trailer so the transom is just ahead of the rear crossmember.
- Adjust the winch post / bow stop so the front handle or bow D-ring meets the bow roller comfortably.
- Check tongue weight: if the tongue feels too light and bouncy, slide the boat forward slightly; if too heavy, slide it back. Aim for that 10–15% range.
- Protect the PVC
- Cover any exposed metal or sharp edges with rubber, old carpet, or foam.
- Make sure U-bolts, bolts, and winch posts do not dig into the tubes when the boat bounces.
- Tie-down points
- Front: Use the front handle or towing D-ring as your main tie point to the winch strap or bow line.
- Rear: Add two transom straps from the rear D-rings (or motor-mount area) down to trailer eyes.
- Center: A soft strap across the inflatable floor or over the tubes can keep the boat from hopping. Keep it snug, not crushing.
- With an outboard installed
- Consider a transom saver bar that transfers engine weight to the trailer frame instead of the inflatable hull.
- Keep engine trimmed down so the load is supported solidly.
Option 2: Flatbed utility trailer (Harbor Freight-style)
A basic 4x8 or 5x8 flatbed utility trailer works very well with the FB385 if you add some simple supports. This is a great option if you already own a small utility trailer or want something multipurpose.
- Build a padded deck or bunks
You have two good setups:
- Full padded deck
- Lay down 3/4" plywood on the frame.
- Cover with marine carpet, stall mats, or thick outdoor gym mats.
- The FB385 then sits right on that padded surface, tubes partly hanging over the edges if the deck is narrower than the full 67" beam.
- Simple V-bunk cradle
- Install two 2x6 bunks in a shallow V, front to back, to roughly match the V-keel.
- Raise them on short brackets so the keel rests in the center and tubes rest partly on the bunks.
- Carpet or pad the bunks.
- Full padded deck
- Position the boat
- Place the FB385 so the transom is near the rear of the trailer deck, but not hanging past the last crossmember.
- Shift the boat forward/back until the tongue weight feels right.
- Add a simple bow stop / winch
- Bolt a short vertical post to the front of the trailer and add a bow stop roller or padded block at the height of the boat’s bow handle.
- A small hand winch makes loading and unloading much easier, especially on ramps.
- Secure the boat
- Front: strap from bow handle or D-ring to the front of the trailer.
- Rear: two ratchet straps from aft D-rings down to the trailer corners.
- Optionally one strap over the middle of the tubes.
- Launching options
- For ramps, you can simply back down until the rear of the trailer is in the water and float the boat off.
- On shallow ramps or beaches, use a pair of launching wheels on the transom or a simple dolly to get from trailer to water.
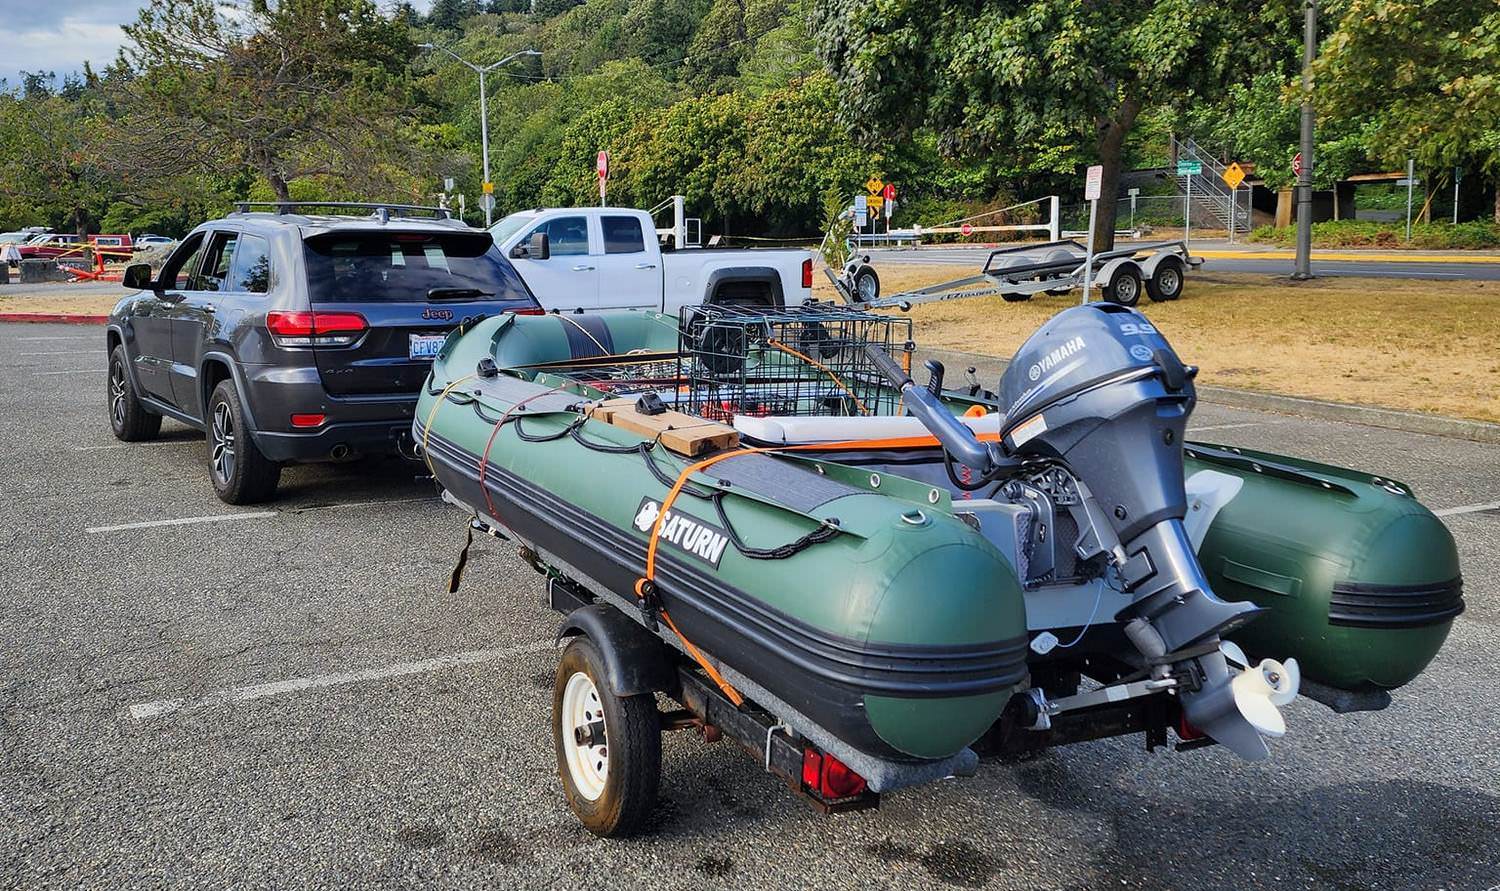
Option 3: Small boat trailer for 12–14 ft aluminum boats
A light boat trailer designed for a 12–14 ft aluminum skiff also works well with the FB385 with a few adjustments.
- Bunks vs rollers
- If the trailer has carpeted bunks, treat it like the jet ski trailer setup: widen, raise, or re-angle the bunks to support the inflatable tubes.
- If it has mostly rollers, do not let bare rollers dig into the PVC. Either:
- Replace some rollers with bunks, or
- Run a padded board over the rollers so the load is spread out.
- Setting the hull position
- Same idea as above: transom just ahead of the rear crossmember, bow supported by a roller or V-block at the winch post.
- Adjust boat position to get proper tongue weight and check that nothing hits the tubes when fully loaded.
- Securing and protecting
- Straps front and rear as before.
- Pad any side guides or fender tops that can rub the tubes.
Inflated vs deflated on the trailer
Many owners of the FB385 prefer to keep the boat fully inflated on a small trailer because it is bulky and heavier to roll up with the high-pressure air deck inside.(saturninflatableboats.ca) Benefits:
- Faster launch: back down, unstrap, launch, and go.
- Less wear from repeated folding/unfolding.
- Easier storage if you can park a trailer at home.
If you keep it inflated on the trailer:
- Check pressure before each trip and top up as needed. Hot sun can increase pressure; cool nights can lower it.
- Avoid storing it outdoors in strong sun for long periods if you can help it; a cover will protect the PVC.
- Periodically check that the boat is not rubbing on any sharp trailer parts as the tires, suspension, and springs move.
Basic safety checklist before towing
No matter which trailer you choose, run through this quick checklist:
- Trailer lights working: brake, turn, and tail lights all functioning.
- Safety chains crossed under the tongue and clipped to the tow vehicle.
- Hitch locked, coupler latched, and pin or lock installed.
- Tires inflated to correct pressure and in good condition.
- Boat straps snug but not over-tightened. Nothing loose that can flap or chafe the tubes.
- Motor locked in transport position, fuel tank secured, and any loose gear inside the boat strapped or stowed.
Wrap-up
The Saturn FB385 is an excellent candidate for trailering: big enough to justify a trailer, but still light compared to a rigid boat of similar size. Whether you adapt a jet ski trailer, a small Harbor Freight-style flatbed, or a 12–14 ft boat trailer, the key is to give the inflatable hull wide, padded support and to balance the load on the frame and hitch.
Set it up once, dial in your strap points, and your launch routine becomes as simple as back down, unhook, and go fishing.