Top rated

DIY rudder for inflatable kayak
Simple DIY kayak rudder for inflatable kayak.
Below are DIY ideas how to install rudder on an inflatable kayak. Cheap, $35 kayak rudders sold on Amazon. Just search for kayak rudder, or click on https://www.amazon.com/s?k=kayak+rudder&ref=nb_sb_...
There are 2 options to install DIY rudder on inflatable kayak. One is to simply drill hole in the end cone, and another is to cut out platform to which attach rudder. If you don't like idea of drilling hole in the end cone, then perhaps option 2 is more preferable.
Option 1:
There is empty space at the very tip of end cone. It is possible to simply drill hole in it, so that to run rudder rod through the hole. Need to make sure that hole is perpendicular to ground, and location is such that rod can stick out on a bottom of hole. That way it can be possible to run pin through rod end, in order to prevent rudder from popping out of hole. Get drill bit similar in diameter to rudder rod, and do not make hole too large.
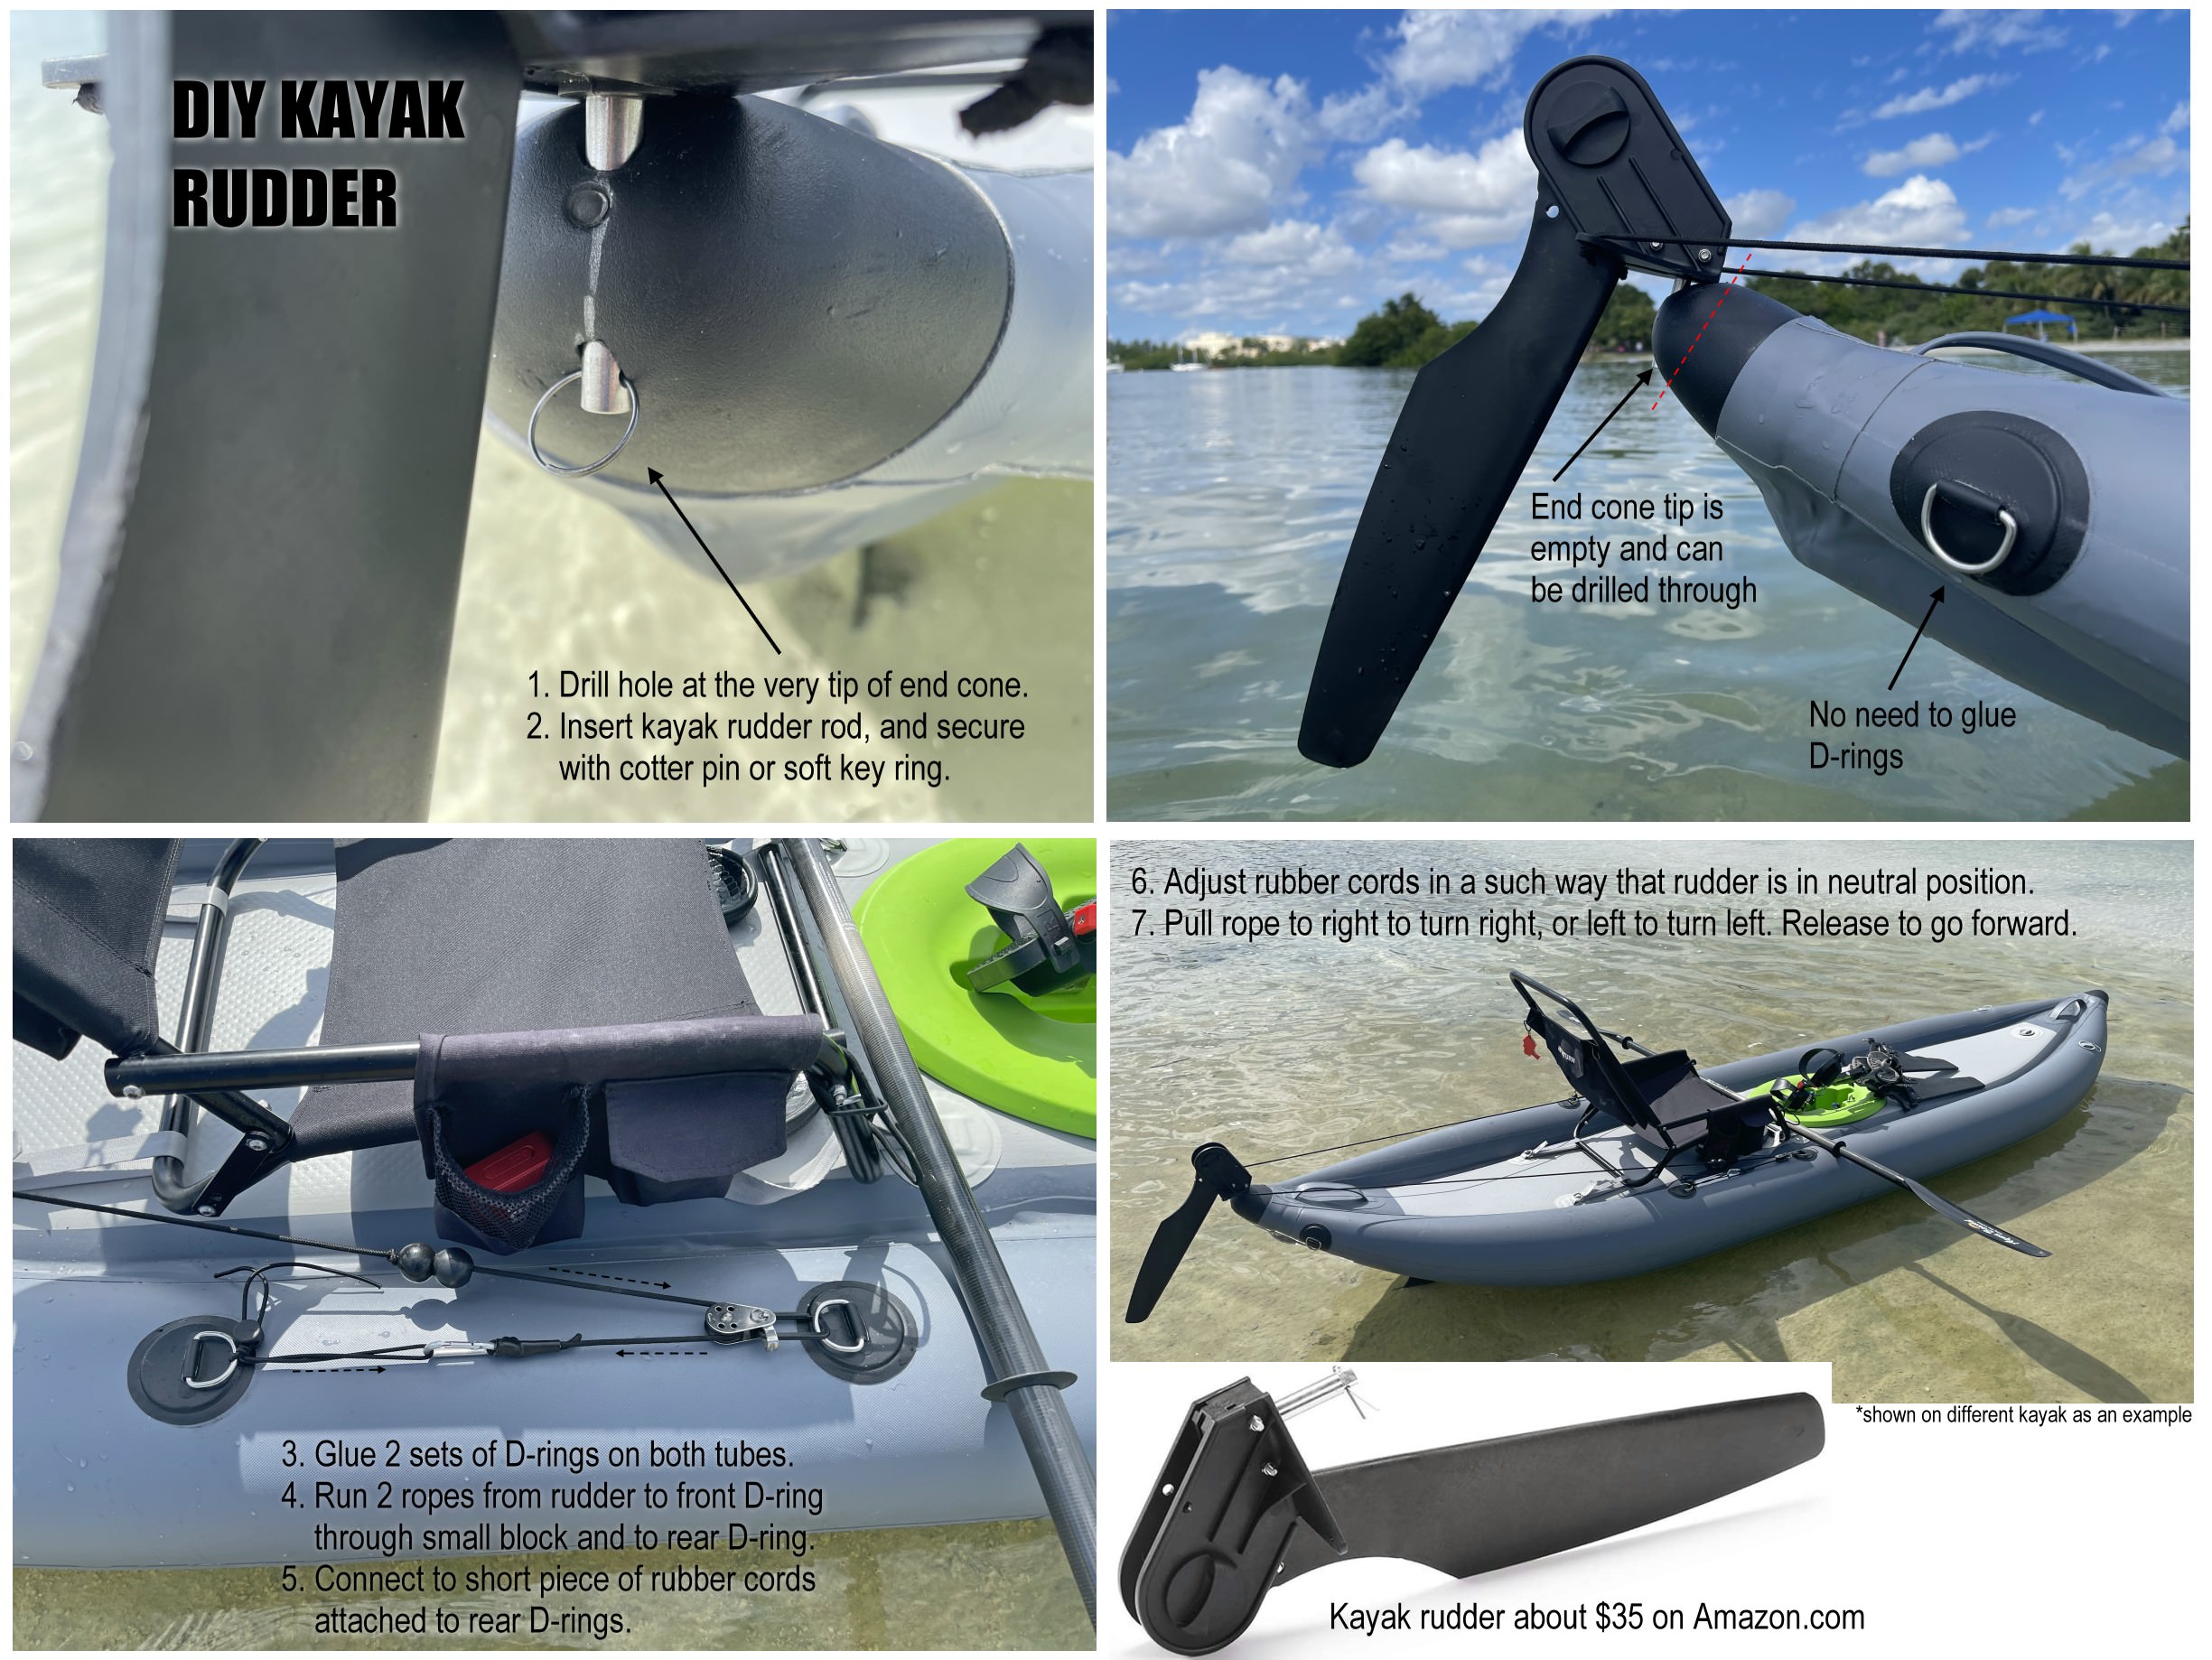
Option 2:
- Use heavy duty plastic food cutting board sold in TJ Maxx or Marshall as an attachment platform for rudder. Cut under angles with jig saw, or just leave rectangular.
- Drill 4 large holes to run lashing tie downs through.
- Get contractor style heavy duty aluminum or steel ruler in local hardware store or Amazon, here https://www.amazon.com/s?k=contractor+aluminum+rul...
- Bend ruler 90 degree and cut shorter. Bolt ruler to plastic board and bolt rudder assembly to ruler. Use spacers if needed for rudder assembly, in case if ruder does not freely rotate and hitting ruler surface. Make sure control lines can be attached to rudder and can be run to the top of kayak tubes without interference with board or kayak.
- Glue 3 D-rings on each tube. 2 D-rings near seating area, and 1 D-rings rear of tubes. Use heat gun to activate glue to insure good hold.
- Run control lines on both sides from ruder, through front 1st D-ring, and back, toward 2nd D-ring. Connect control string to short bungee cord with small carabiner, to make removal easier. Attach small ball or plastic handle or short PVC pipe to control line, so that to make it easier to pull forward to operate ruder.
- Adjust bungee cords on both sides in such way that they are under slight tension while rudder position in a center.
- When operating rudder, note that slight motion of ball or handle is enough to change direction. Do not need to pull too much. Just pull forward left side slightly to go left, and pull slightly right side to turn right.
.JPG?1630173965508)
.jpg?1630173983069)
.JPG?1630174001157)
.JPG?1630174024482)
.JPG?1630174047017)
.JPG?1630174067983)
Videos of rudder in action.
Added small blocks to make pulling rudder easier.
.jpg?1632238276093)
.jpg?1632238301192)